Hello, World!
この節では初めてのRust and WebAssemblyプログラム——"Hello, World!"とアラートするウェブページ——をどうビルドし実行するかを説明します。
始める前に必ずセットアップの指示に従ってください。
プロジェクトテンプレートをクローンする
プロジェクトテンプレートが真っ当な既定の状態に予め設定されるので、ウェブのためのコードを素早くビルドし、統合し、パッケージ化できるようになります。
このコマンドでプロジェクトテンプレートをクローンします:
cargo generate --git https://github.com/rustwasm/wasm-pack-template
このコマンドを入力すると新しいプロジェクトの名前を入力するよう促されるはずです。ここでは "wasm-game-of-life" とします。
wasm-game-of-life
入っているもの
wasm-game-of-lifeプロジェクトに入ってください
cd wasm-game-of-life
そしてその中身を見ましょう:
wasm-game-of-life/
├── Cargo.toml
├── LICENSE_APACHE
├── LICENSE_MIT
├── README.md
└── src
    ├── lib.rs
    └── utils.rs
これらのファイルから二つを詳細に見ましょう。
wasm-game-of-life/Cargo.toml
Cargo.tomlファイルは依存とcargo——Rustのパッケージマネージャでありビルドツールである——のメタデータを指定します。このファイルはwasm-bindgenへの依存とあとで掘り下げるオプションの依存とcrate-typeが.wasmライブラリを生成するよう正しく初期化された状態に予め設定されています。
wasm-game-of-life/src/lib.rs
src/lib.rsファイルはWebAssemblyにコンパイルするRustクレートのルートです。このファイルはwasm-bindgenをJavaScriptとのインターフェイスとして使っています。また、JavaScript関数のwindow.alertをインポートし、挨拶メッセージをアラートするRust関数greetをエクスポートしています。
# #![allow(unused_variables)]
#fn main() {
extern crate cfg_if;
extern crate wasm_bindgen;

mod utils;

use cfg_if::cfg_if;
use wasm_bindgen::prelude::*;

cfg_if! {
    // `wee_alloc` featureが有効になっているとき、
    // `wee_alloc`をグローバルアロケータとして使います。
    if #[cfg(feature = "wee_alloc")] {
        extern crate wee_alloc;
        #[global_allocator]
        static ALLOC: wee_alloc::WeeAlloc = wee_alloc::WeeAlloc::INIT;
    }
}

#[wasm_bindgen]
extern {
    fn alert(s: &str);
}

#[wasm_bindgen]
pub fn greet() {
    alert("Hello, wasm-game-of-life!");
}

#}
wasm-game-of-life/src/utils.rs
src/utils.rsモジュールはRustを使って作業することを簡単にする一般的なユーティリティを提供しています。あとでこれらのユーティリティの詳細をチュートリアル内で——例えばwasmコードのデバッグについて考えるときに——見ることになりますが、今はこのファイルを無視することができます。
プロジェクトをビルドする
wasm-packを使って次のビルド手順を指揮します:
- Rust 1.30以上と
wasm32-unknown-unknownターゲットをrustupを通してインストールしていることを確認します。 cargoを使用してRustのソースをWebAssemblyの.wasmバイナリにコンパイルします。wasm-bindgenを使ってRustで生成したWebAssemblyを使用するためのJavaScript APIを生成します。
それらの全てを行うために、プロジェクトディレクトリでこのコマンドを実行します:
wasm-pack build
ビルドが完了したとき、その生成物はpkgディレクトリで見つけることができ、中身は次のようになっているはずです:
pkg/
├── package.json
├── README.md
├── wasm_game_of_life_bg.wasm
├── wasm_game_of_life.d.ts
└── wasm_game_of_life.js
README.mdファイルはメインプロジェクトからコピーされていますが、他のファイルはまったく新しいものです。
wasm-game-of-life/pkg/wasm_game_of_life_bg.wasm
.wasmファイルはRustのソースからRustコンパイラによって生成されたWebAssemblyのバイナリです。Rustの関数とデータ全てのwasmにコンパイルされたバージョンを含んでいます。例えば、エクスポートされた"greet"関数を含んでいます。
wasm-game-of-life/pkg/wasm_game_of_life.js
The .js file is generated by wasm-bindgen and contains JavaScript glue for
importing DOM and JavaScript functions into Rust and exposing a nice API to the
WebAssembly functions to JavaScript. For example, there is a JavaScript greet
function that wraps the greet function exported from the WebAssembly
module. Right now, this glue isn't doing much, but when we start passing more
interesting values back and forth between wasm and JavaScript, it will help
shepherd those values across the boundary.
import * as wasm from './wasm_game_of_life_bg';

// ...

export function greet() {
    return wasm.greet();
}
wasm-game-of-life/pkg/wasm_game_of_life.d.ts
The .d.ts file contains TypeScript type declarations for the JavaScript
glue. If you are using TypeScript, you can have your calls into WebAssembly
functions type checked, and your IDE can provide autocompletions and
suggestions! If you aren't using TypeScript, you can safely ignore this file.
export function greet(): void;
wasm-game-of-life/pkg/package.json
The package.json file contains metadata about the generated JavaScript and
WebAssembly package. This is used by npm and JavaScript bundlers
to determine dependencies across packages, package names, versions, and a bunch
of other stuff. It helps us integrate with JavaScript tooling and allows us to
publish our package to npm.
{
  "name": "wasm-game-of-life",
  "collaborators": [
    "Your Name <your.email@example.com>"
  ],
  "description": null,
  "version": "0.1.0",
  "license": null,
  "repository": null,
  "files": [
    "wasm_game_of_life_bg.wasm",
    "wasm_game_of_life.d.ts"
  ],
  "main": "wasm_game_of_life.js",
  "types": "wasm_game_of_life.d.ts"
}
Putting it into a Web Page
To take our wasm-game-of-life package and use it in a Web page, we use the
create-wasm-app JavaScript project template.
Run this command within the wasm-game-of-life directory:
npm init wasm-app www
Here's what our new wasm-game-of-life/www subdirectory contains:
wasm-game-of-life/www/
├── bootstrap.js
├── index.html
├── index.js
├── LICENSE-APACHE
├── LICENSE-MIT
├── package.json
├── README.md
└── webpack.config.js
Once again, let's take a closer look at some of these files.
wasm-game-of-life/www/package.json
This package.json comes pre-configured with webpack and webpack-dev-server
dependencies, as well as a dependency on hello-wasm-pack, which is a version
of the initial wasm-pack-template package that has been published to npm.
wasm-game-of-life/www/webpack.config.js
This file configures webpack and its local development server. It comes pre-configured, and you shouldn't have to tweak this at all to get webpack and its local development server working.
wasm-game-of-life/www/index.html
This is the root HTML file for the Web page. It doesn't do much other than
load bootstrap.js, which is a very thin wrapper around index.js.
<!DOCTYPE html>
<html>
  <head>
    <meta charset="utf-8">
    <title>Hello wasm-pack!</title>
  </head>
  <body>
    <script src="./bootstrap.js"></script>
  </body>
</html>
wasm-game-of-life/www/index.js
The index.js is the main entry point for our Web page's JavaScript. It imports
the hello-wasm-pack npm package, which contains the default
wasm-pack-template's compiled WebAssembly and JavaScript glue, then it calls
hello-wasm-pack's greet function.
import * as wasm from "hello-wasm-pack";

wasm.greet();
Install the dependencies
First, ensure that the local development server and its dependencies are
installed by running npm install within the wasm-game-of-life/www
subdirectory:
npm install
This command only needs to be run once, and will install the webpack
JavaScript bundler and its development server.
Note that
webpackis not required for working with Rust and WebAssembly, it is just the bundler and development server we've chosen for convenience here. Parcel and Rollup should also support importing WebAssembly as ECMAScript modules.
Using our Local wasm-game-of-life Package in www
Rather than use the hello-wasm-pack package from npm, we want to use our local
wasm-game-of-life package instead. This will allow us to incrementally develop
our Game of Life program.
First, run npm link inside the wasm-game-of-life/pkg directory, so that the
local package can be depended upon by other local packages without publishing
them to npm:
npm link
🐞 Did you get
EACCESSor permissions errors when runningnpm link? How to Prevent Permissions Errors withnpm.
Second, use the npm linked version of the wasm-game-of-life from the www
package by running this command within wasm-game-of-life/www:
npm link wasm-game-of-life
Finally, modify wasm-game-of-life/www/index.js to import wasm-game-of-life
instead of the hello-wasm-pack package:
import * as wasm from "wasm-game-of-life";

wasm.greet();
Our Web page is now ready to be served locally!
Serving Locally
Next, open a new terminal for the development server. Running the server in a
new terminal lets us leave it running in the background, and doesn't block us
from running other commands in the meantime. In the new terminal, run this
command from within the wasm-game-of-life/www directory:
npm run start
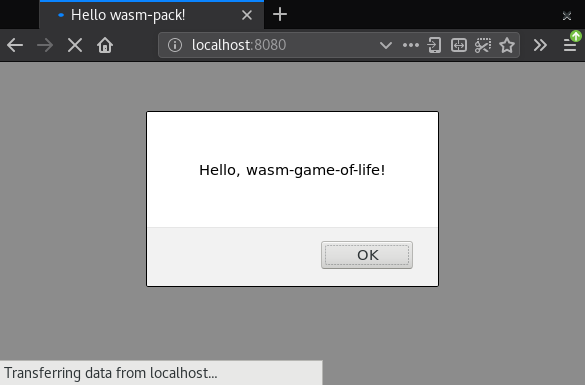
Navigate your Web browser to http://localhost:8080/ and you should be greeted with an alert message:
Anytime you make changes and want them reflected on
http://localhost:8080/, just re-run the wasm-pack build command within the wasm-game-of-life directory.
Exercises
-
Modify the
greetfunction inwasm-game-of-life/src/lib.rsto take aname: &strparameter that customizes the alerted message, and pass your name to thegreetfunction from insidewasm-game-of-life/www/index.js. Rebuild the.wasmbinary withwasm-pack build, then refresh http://localhost:8080/ in your Web browser and you should see a customized greeting!Answer
New version of the
greetfunction inwasm-game-of-life/src/lib.rs:# #![allow(unused_variables)] #fn main() { #[wasm_bindgen] pub fn greet(name: &str) { alert(&format!("Hello, {}!", name)); } #}New invocation of
greetinwasm-game-of-life/www/index.js:wasm.greet("Your Name");